Buy a VPS
Pick a location, operating system and plan, set a root password, and pay from your wallet to get a server in about 30 seconds.
A VPS is a virtual server with full root access. You choose where it runs, which system it starts with and how big it is, and Helipod creates it for you. Open your project, choose VPS in the sidebar and click Create VPS. The form has three steps: Plan & OS, Configure and Review.
Shared or dedicated IPv4
Every plan card shows IPv4 with a small help icon. It tells you how the server is reached from the internet:
- Dedicated IPv4: the VPS has its own public address. You connect to it directly, on any port you open.
- Shared IPv4: the VPS runs on Helipod's own servers (for example the EU plans in Germany) and shares one public address with other servers on the same machine. You get your own SSH port and a range of ports on that address, and you route a domain to the server over HTTP and HTTPS. See Ports and domains.
The tabs you see after the VPS is created also depend on the location:
| Tab | Shared IPv4 | Dedicated IPv4 |
|---|---|---|
| Overview, SSH (or RDP on Windows) | Yes | Yes |
| Network (ports and domains) | Yes | No, open ports in the system or the firewall |
| Metrics, Terminal | Yes | Depending on the location |
| Firewall | No | Depending on the location |
| Snapshot | No | Depending on the location |
| Backup (Linux only) | Yes | Depending on the location |
If one of these matters to you, compare the locations before you buy.
Create the VPS
Plan & OS
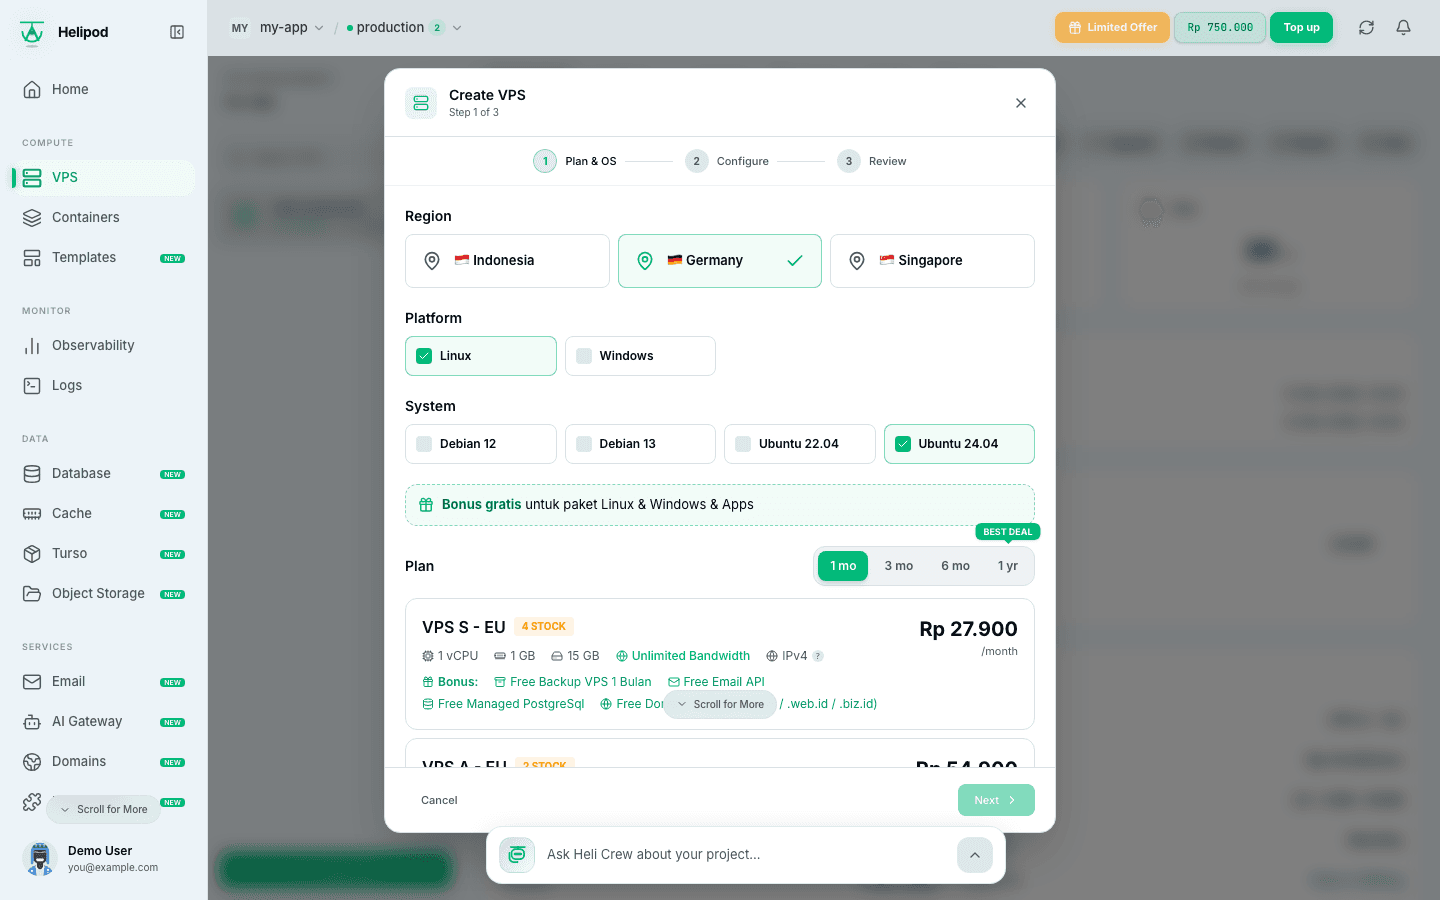
- Region: where the server runs, for example Indonesia, Germany or Singapore. Pick the one closest to your users.
- Platform: the kind of image, such as Linux, Apps (an image with an application already installed) or Windows. The list depends on the region.
- System: the operating system, for example Ubuntu 24.04 or Debian 12.
- Billing period: 1 mo, 3 mo, 6 mo or 1 yr. Longer periods are cheaper per month; the plan card shows the saving (HEMAT) and the total for the period. 1 yr is selected by default.
Then pick a plan. Each card shows the vCPU, RAM, disk and bandwidth, the IPv4 type, and the price per month. A card can also show:
- Sold Out or a stock count when only a few are left.
- OS N/A when the plan does not offer the system you picked.
- Bonus: extras that come with the plan, such as a free domain. A grey bonus with (min. ...) needs a longer billing period, and the form suggests that period above the plans.
Configure
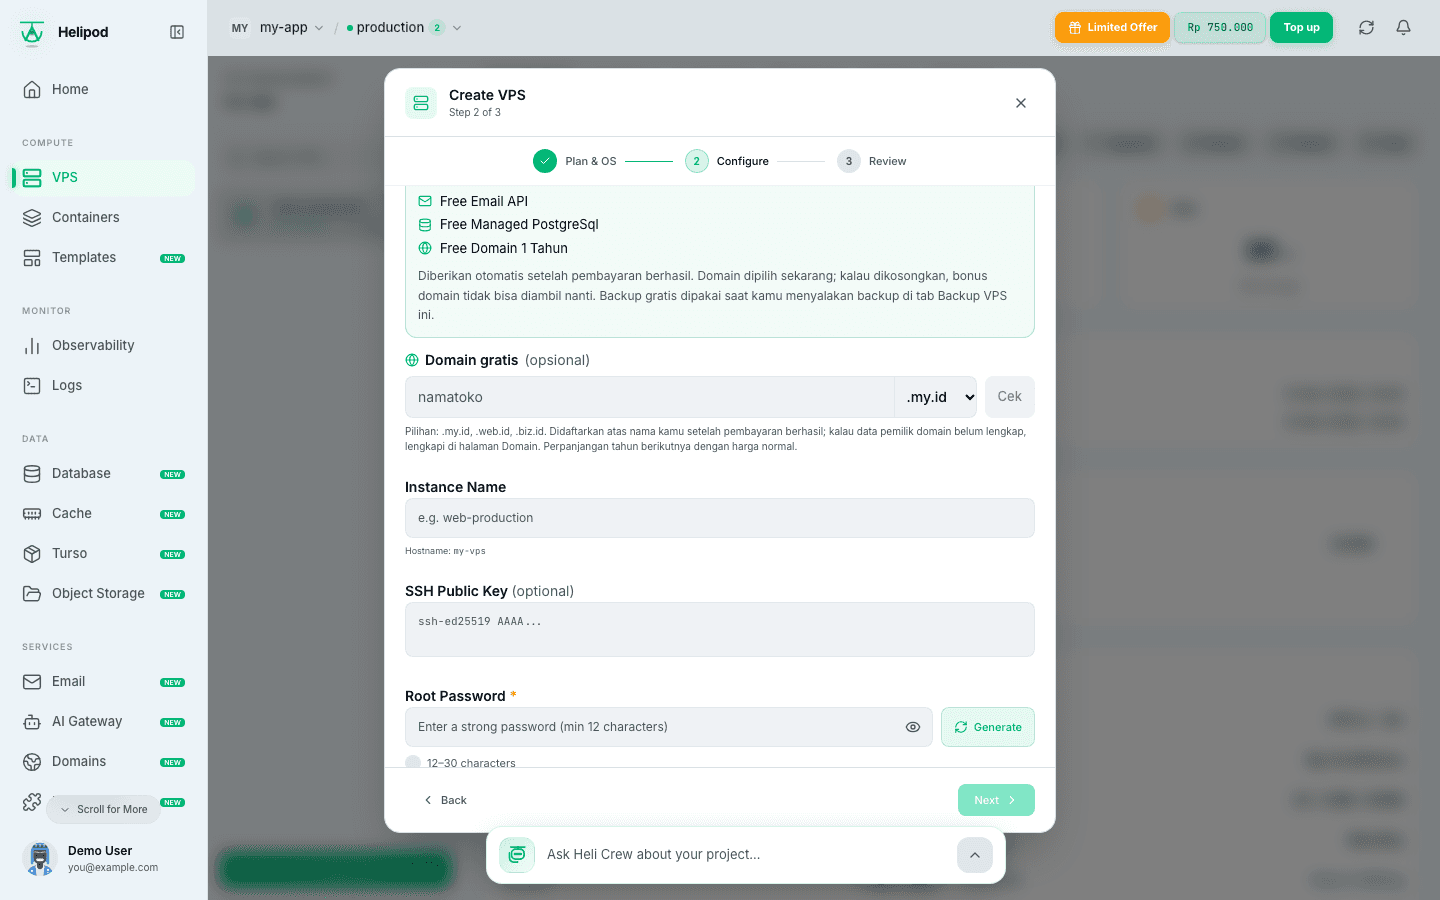
- Instance Name: lowercase letters, numbers and hyphens, for example
web-production. It also becomes the server's hostname. - SSH Public Key (optional, not offered in every location): paste a public key such as
ssh-ed25519 AAAA...to log in without a password. See Connect to your VPS for how to make one. - Root Password (required): 12 to 30 characters, with upper and lower case letters, at least one number and at least one of these symbols:
! @ # $ % ^ *. No spaces or other symbols. Click Generate for a strong one; the checklist under the field turns green when every rule is met.
If the plan comes with a free domain, choose its name and extension here. It is checked before you can continue.
Review
Check the plan, region, CPU, RAM, disk, bandwidth, system, billing period, the total and the expiry date. Then click Create VPS.
The order is paid from your wallet. The VPS is active after provisioning, usually about 30 seconds, and opens on its Overview tab.
Save the root password now
After the VPS is created, the root password is shown in a banner at the top of the page only once. Copy it to a password manager before you close the banner. You can set a new one later from the SSH tab (or the RDP tab on Windows).
If your wallet is short
When the wallet does not cover the order, the Review step says so and the button changes to Bayar with the total. Click it to go to a payment page and pay by any method offered there. The link is valid for 3 hours.
Your order is kept while you pay. When you come back, the VPS page checks the payment and creates the server automatically; this can take a few minutes. If the payment was received but the server could not be created, the money stays in your wallet and you can try again from the same dialog.
A VPS is paid in advance for the period you chose, and auto-renew is on by default. See Manage your VPS for renewing, upgrading and what happens at expiry.