Email sending domain
Activate email, verify a sending domain with DNS records, and send your first email through the API or SMTP.
To send email from your app (receipts, password resets, notifications) you activate the email service for the project, verify a domain you own, and create an API key. The same key works for the REST API and for SMTP.
Open your project and choose Email in the sidebar.
Activate the email service
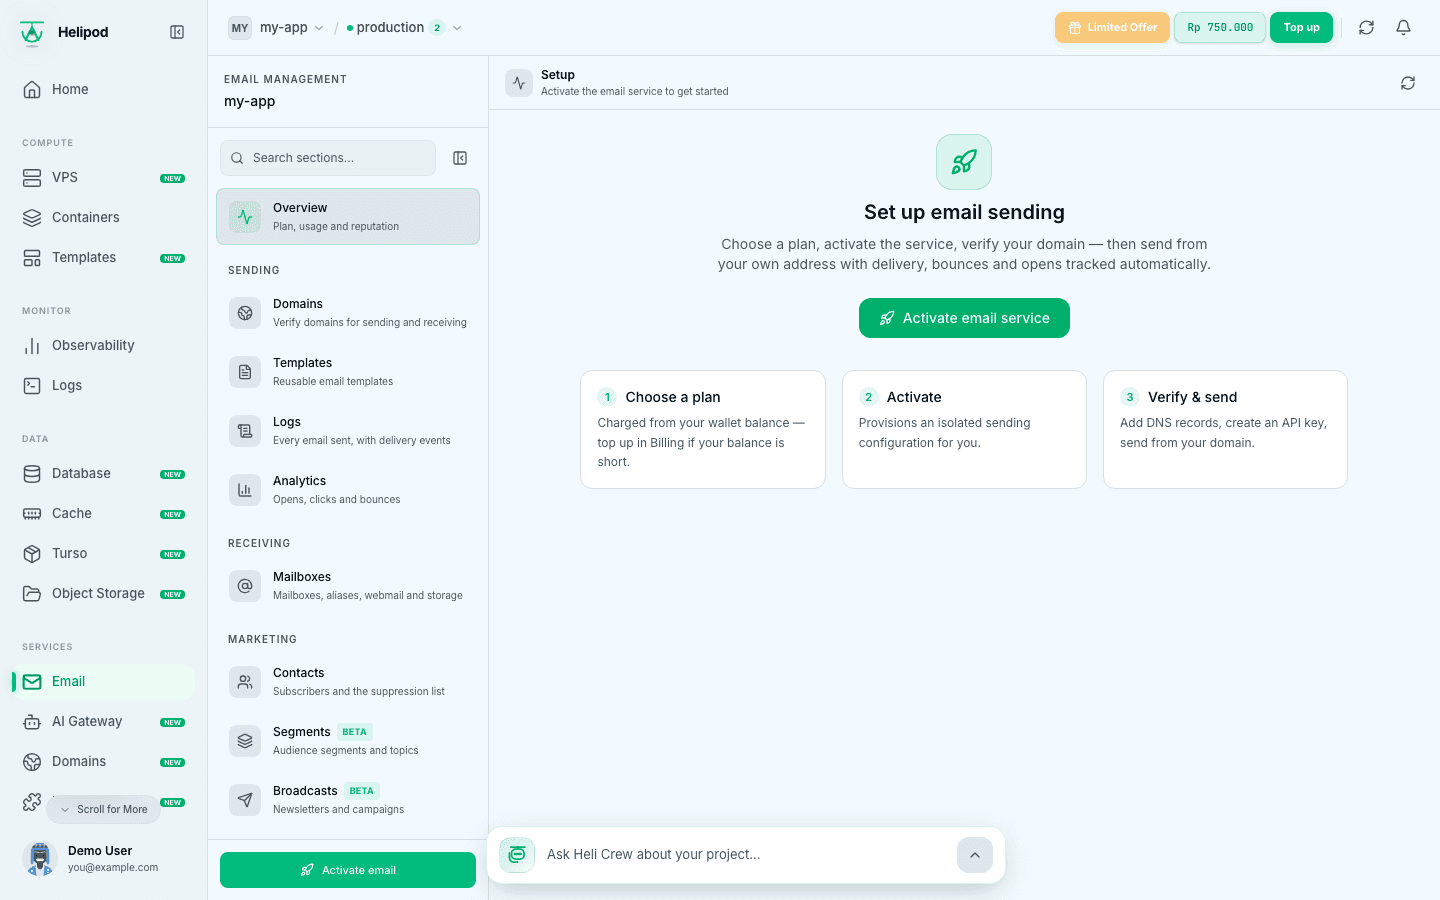
Open the activation dialog
On Set up email sending, click Activate email service.
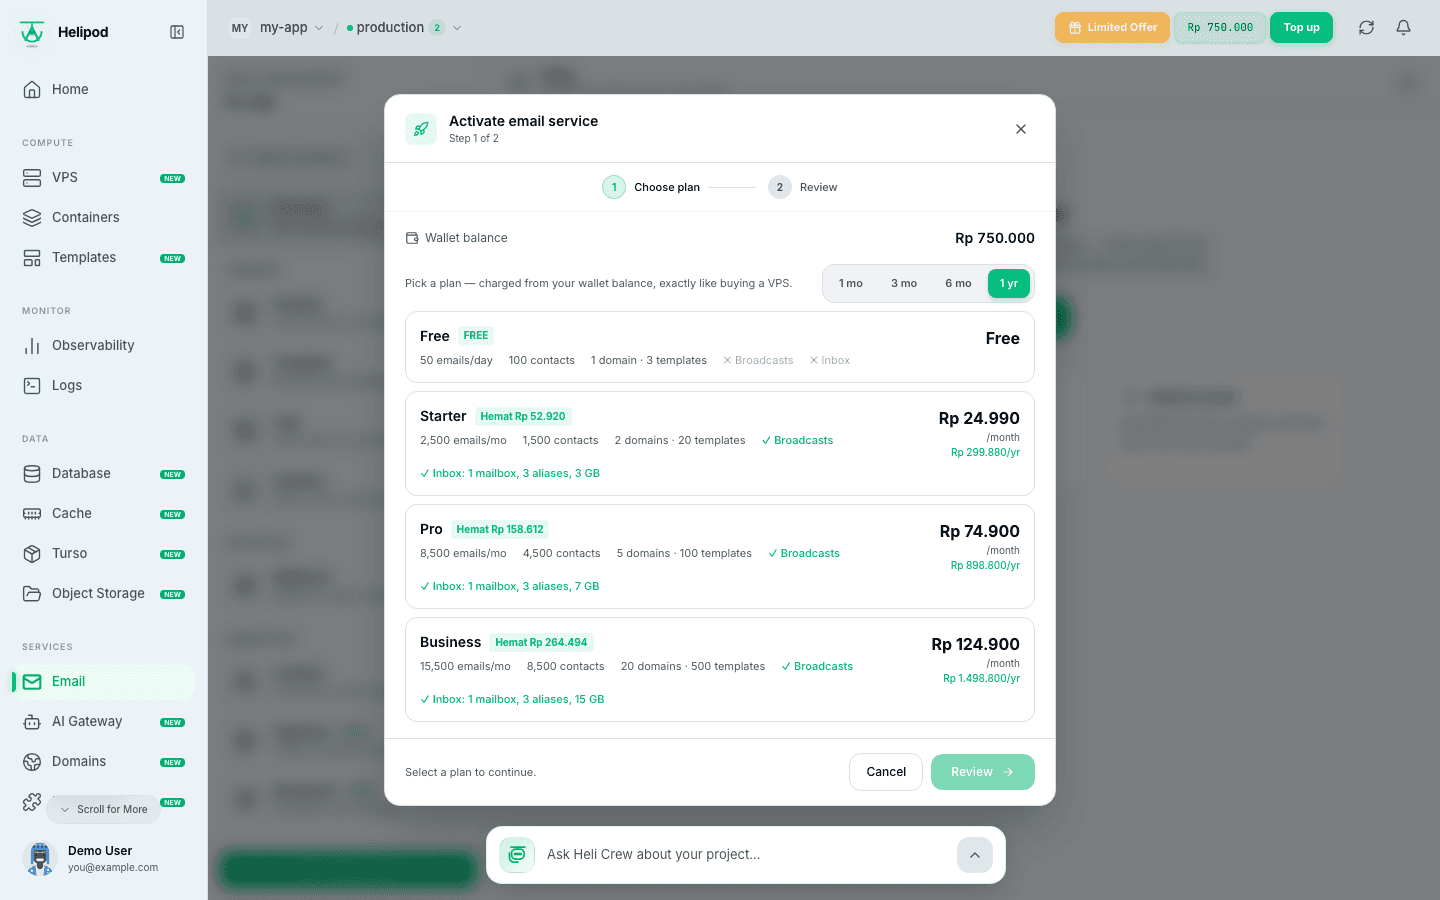
Choose a plan
The dialog shows your Wallet balance and the plans with their monthly price. Pick a billing period (1 mo, 3 mo, 6 mo or 1 yr; longer periods show a discount) and select a plan.
Review
The Review step lists the billing period, price per month, start and expiry dates, Wallet after purchase, and what the plan includes: emails, contacts, domains, templates, webhooks, broadcasts, send rate and what happens over quota.
A free plan charges nothing. A paid plan is charged to your wallet; if the balance is short, the dialog tells you how much is needed, and you can top up under Billing.
Activate
Click Activate email service. Provisioning starts right away and takes a moment.
Add and verify a sending domain
Go to Domains in the Email menu.
Add the domain
Click Add domain, type the domain and click Add & get DNS records.
Use a subdomain such as send.yourdomain.com or mail.yourdomain.com. That keeps the root domain free for your website and your existing mailbox, and keeps the sending reputation separate.
Publish the DNS records
Click Show DNS setup. The records are grouped in steps, and each record has a Host and a Value with a copy button:
- Verify ownership: a
TXTrecord. - SPF: a
TXTrecord. - DKIM:
CNAMErecords. These keys are issued after ownership is proven, so press Verify once after step 1 and they appear. - DMARC: a
TXTrecord on_dmarc.
Copy each record into your DNS provider. If you bought the domain on Helipod, add them under Domains → My Domains → DNS Records (see Buy a domain).
Verify
Wait a few minutes for DNS to propagate, then click Verify. Each step changes to Done when its record is found, and the domain status becomes Verified. DKIM can take longer; propagation can take up to 72 hours in the worst case.
Custom MAIL FROM
When the domain has a custom MAIL FROM, a Custom MAIL FROM step lists an MX and a TXT record. Publish them so bounces and complaints route through your domain, then press Verify again.
A sample of what you publish for send.yourdomain.com (copy the exact hosts and values from the dashboard, they are unique to your domain):
| Type | Host | Value |
|---|---|---|
TXT | the ownership host shown | the ownership token |
TXT | send.yourdomain.com | v=spf1 include:... ~all |
CNAME | <selector>._domainkey.send.yourdomain.com | the DKIM target shown |
TXT | _dmarc.send.yourdomain.com | v=DMARC1; p=none |
In Helipod DNS (and most registrars) the Name field is relative to your root domain. For the host _dmarc.send.yourdomain.com, enter _dmarc.send.
Create an API key
Go to API & webhooks. Under API keys, type a name (for example Production or CI) and click Create key. The key starts with hel_ and is shown once: copy it and store it as a secret, for example HELIPOD_EMAIL_KEY.
On the same page, Webhooks sends delivery, bounce and open events to an HTTPS endpoint of yours, signed with Helipod-Signature.
Send a test
Go to Test send. Choose the From address on your verified domain, add a To address, a Subject and a body, and click Send test. The Last send panel shows the delivery status, and Open in Logs shows the full event history. Test sends count toward your quota.
Send from your app
POST https://mail.helipod.io/api/email/send with the key as a bearer token. The from address must be on a verified domain of the project.
curl -X POST https://mail.helipod.io/api/email/send \
  -H "Authorization: Bearer $HELIPOD_EMAIL_KEY" \
  -H "Content-Type: application/json" \
  -d '{
    "from": "Acme <[email protected]>",
    "to": ["[email protected]"],
    "subject": "Your receipt for order {{orderId}}",
    "html": "<p>Hi {{name}}, thanks for order <b>{{orderId}}</b>.</p>",
    "text": "Hi {{name}}, thanks for order {{orderId}}.",
    "variables": { "name": "Ana", "orderId": "A-1042" }
  }'
The API answers 202 Accepted with an email id; delivery happens in the background. Send both html and text when you can, it improves deliverability.
Send over SMTP
For WordPress, Laravel, PHPMailer, Nodemailer or any app that speaks SMTP, use the values in the SMTP panel of API & webhooks:
| Setting | Value |
|---|---|
| Host | smtp.helipod.io |
| Port | 587 with STARTTLS (recommended), or 465 with SSL/TLS |
| Username | apikey (any value works; the key identifies the project) |
| Password | your API key (hel_...) |
| From address | an address on a verified domain |
SMTP uses the same quota, checks, logs and webhooks as the API.