Getting started
Sign in, find your project and environments, top up your wallet and deploy your first app.
This guide takes you from a new account to your first deploy. You will sign in, learn how projects and environments work, add money to your wallet, and then pick what to run.
Sign in with Google
Open helipod.io/signin and click Continue with Google (Lanjutkan dengan Google in Indonesian). Google is the only way to sign in, so there is no separate password to remember.
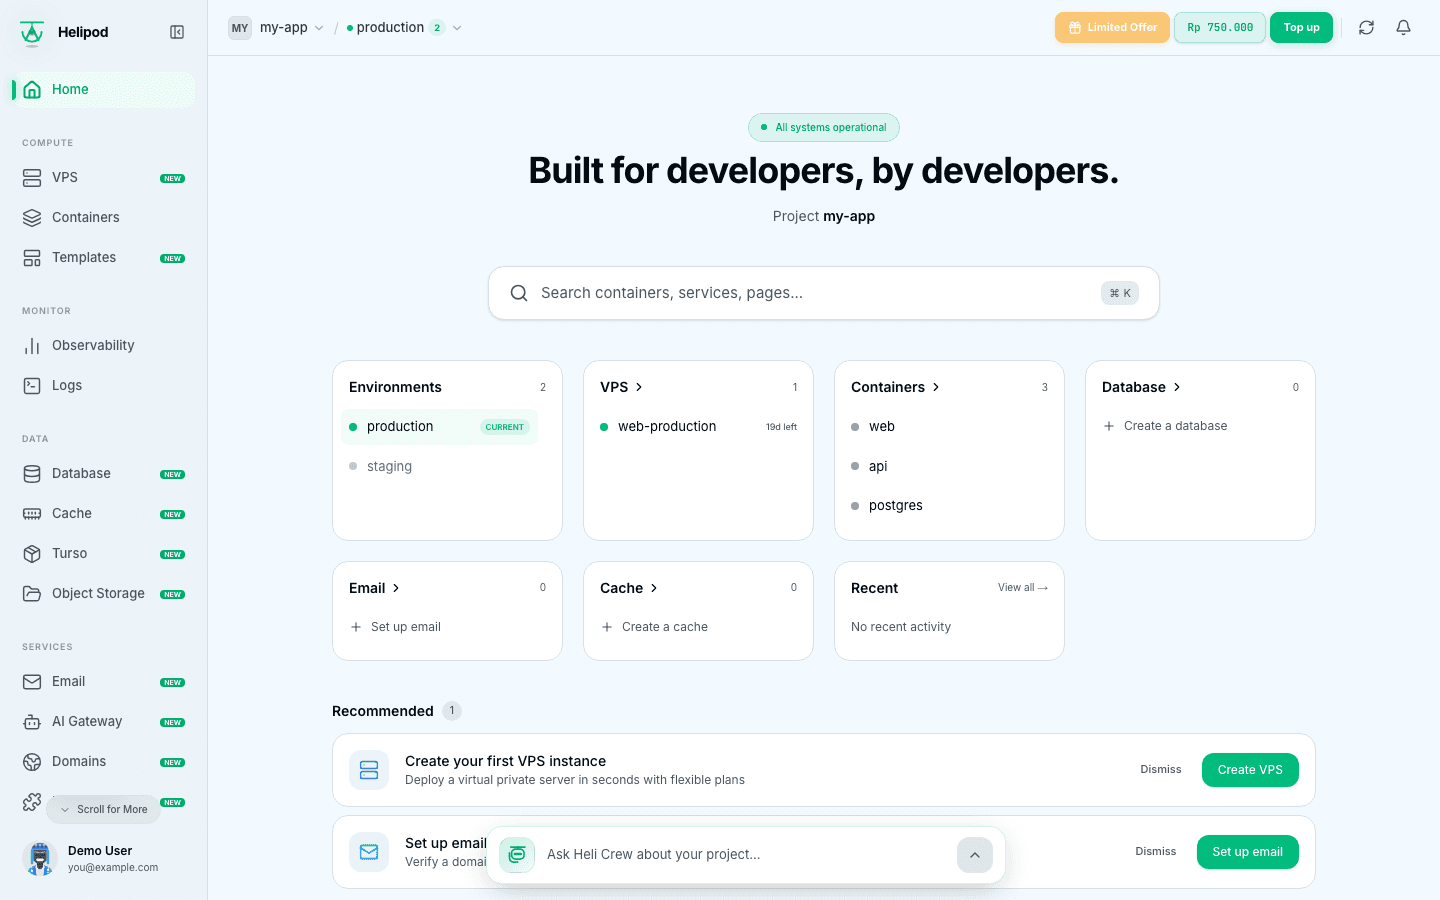
The first time you sign in, Helipod creates an account for you with one project (it gets a random name such as calm-lake-a1b2c3) and an environment called Production. You land on that project's Home page.
Switch between projects
A project holds everything for one app or one customer: containers, VPS, databases, email, domains and team members. The project name is shown at the top left of the dashboard.
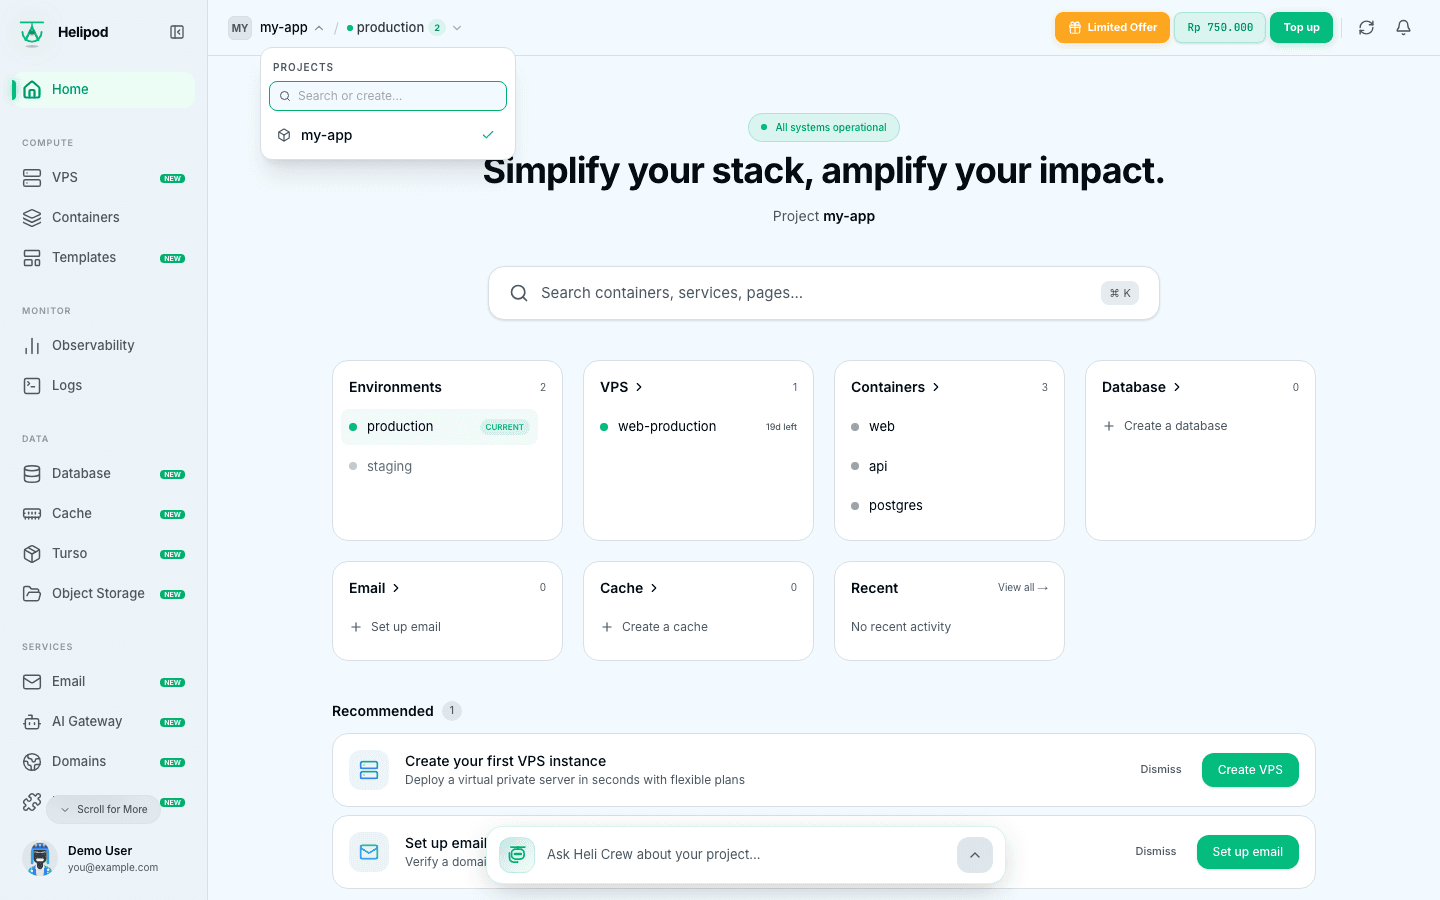
Click the project name to open the Projects list. Pick a project to switch to it, or type a new name in Search or create… and click Create to make a new project.
Switch between environments
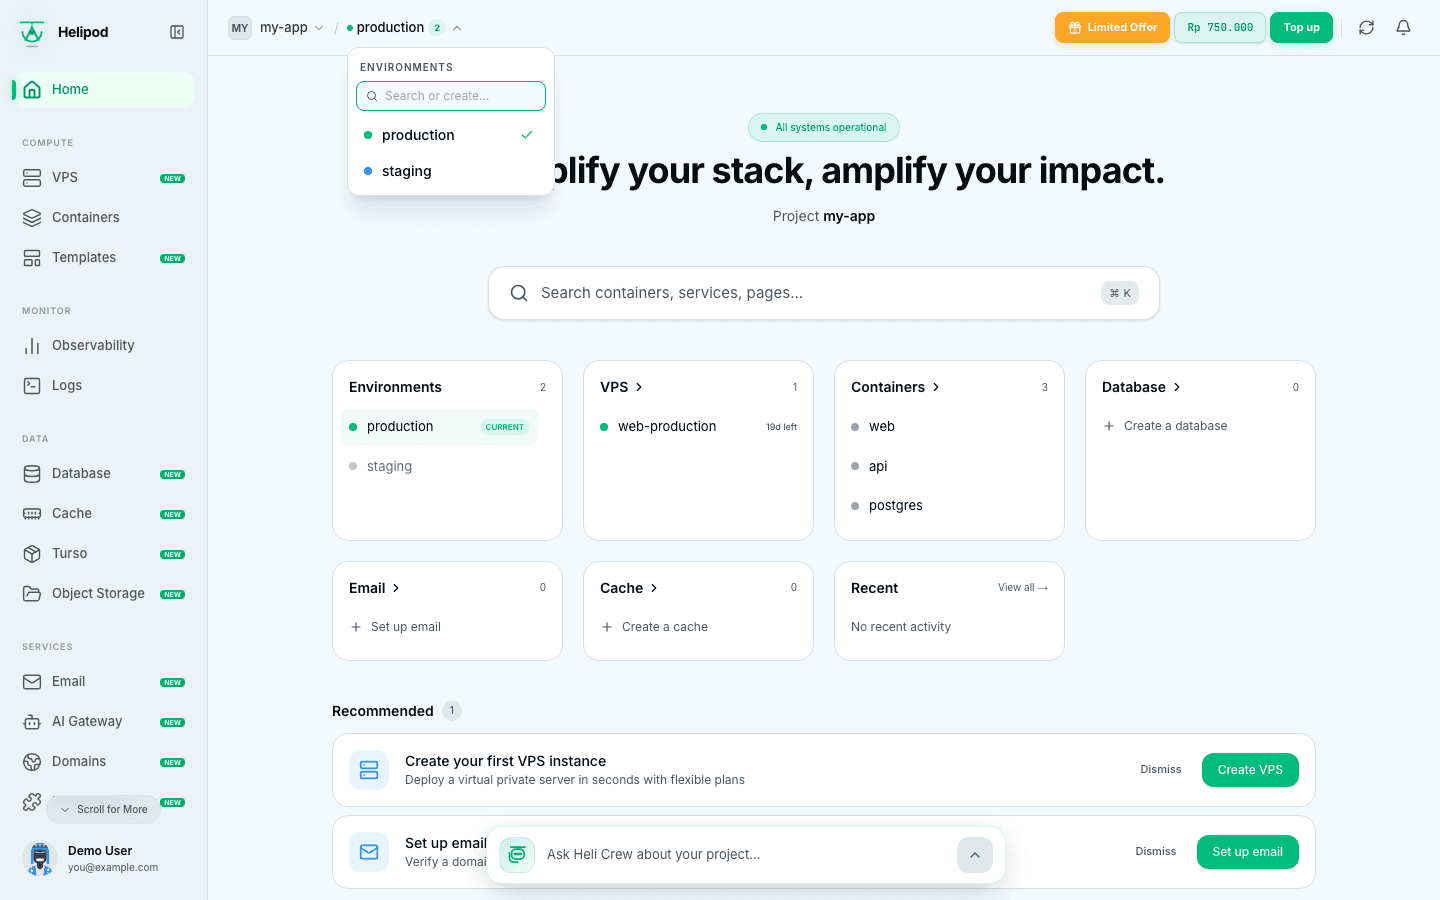
Next to the project name (after the /) is the current environment. Environments are separate copies of your services inside one project, each with its own variables and domains. A common setup is:
- Production: the version your users see.
- staging: a copy where you try changes first, without touching production.
Click the environment name to open the Environments list and switch. To add one, type a name in Search or create… and click Create. Names need at least 6 characters and can contain only letters and underscores (for example staging). You can also manage environments in Settings → Environments, see Team and projects.
Top up your wallet
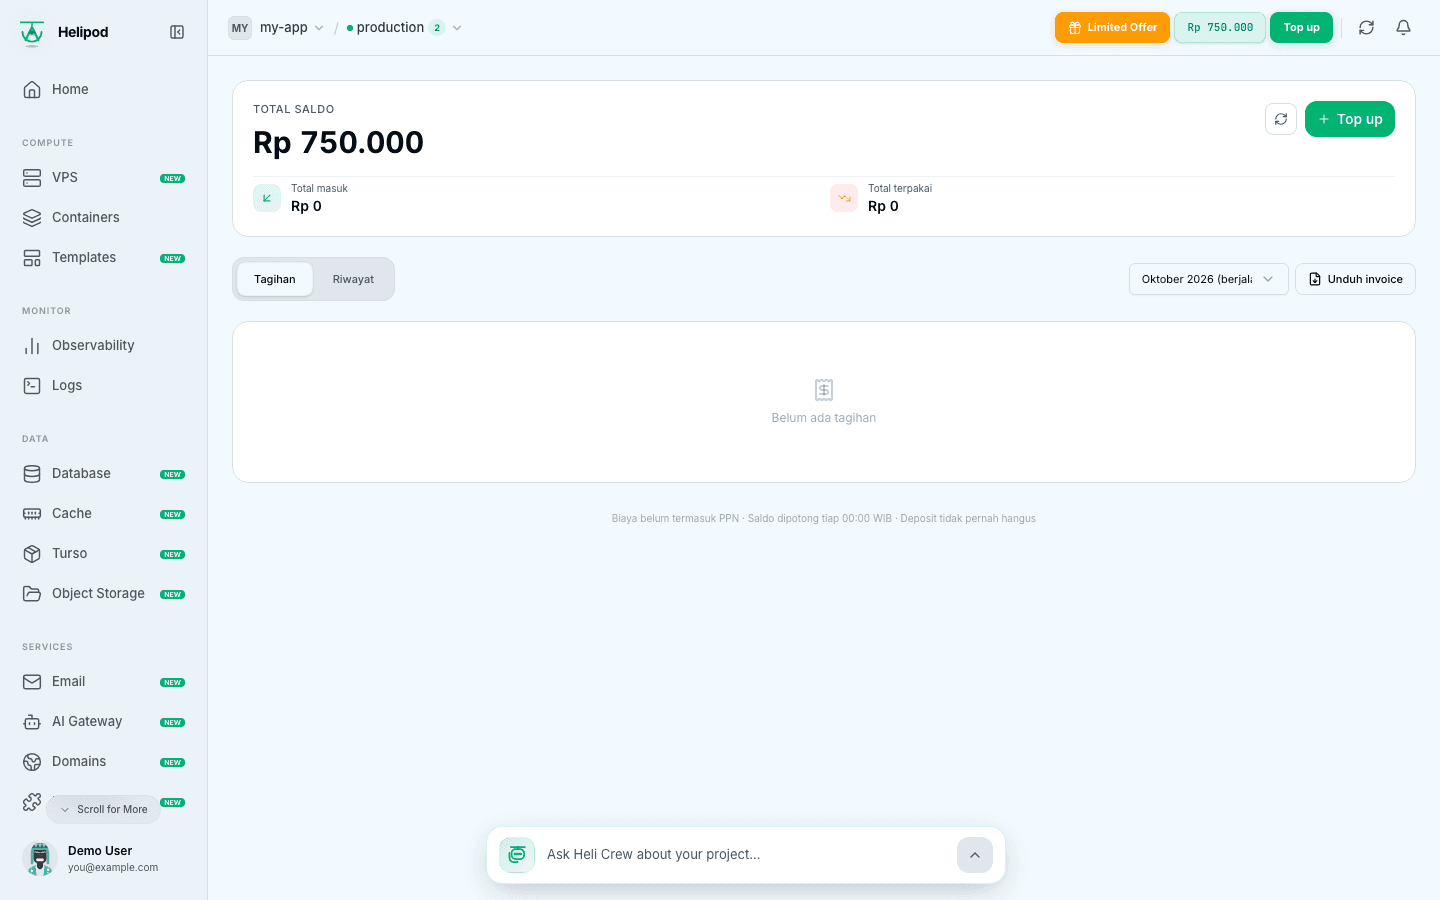
Helipod is prepaid: everything you buy is paid from your wallet in Rupiah. Your balance is shown in the top bar.
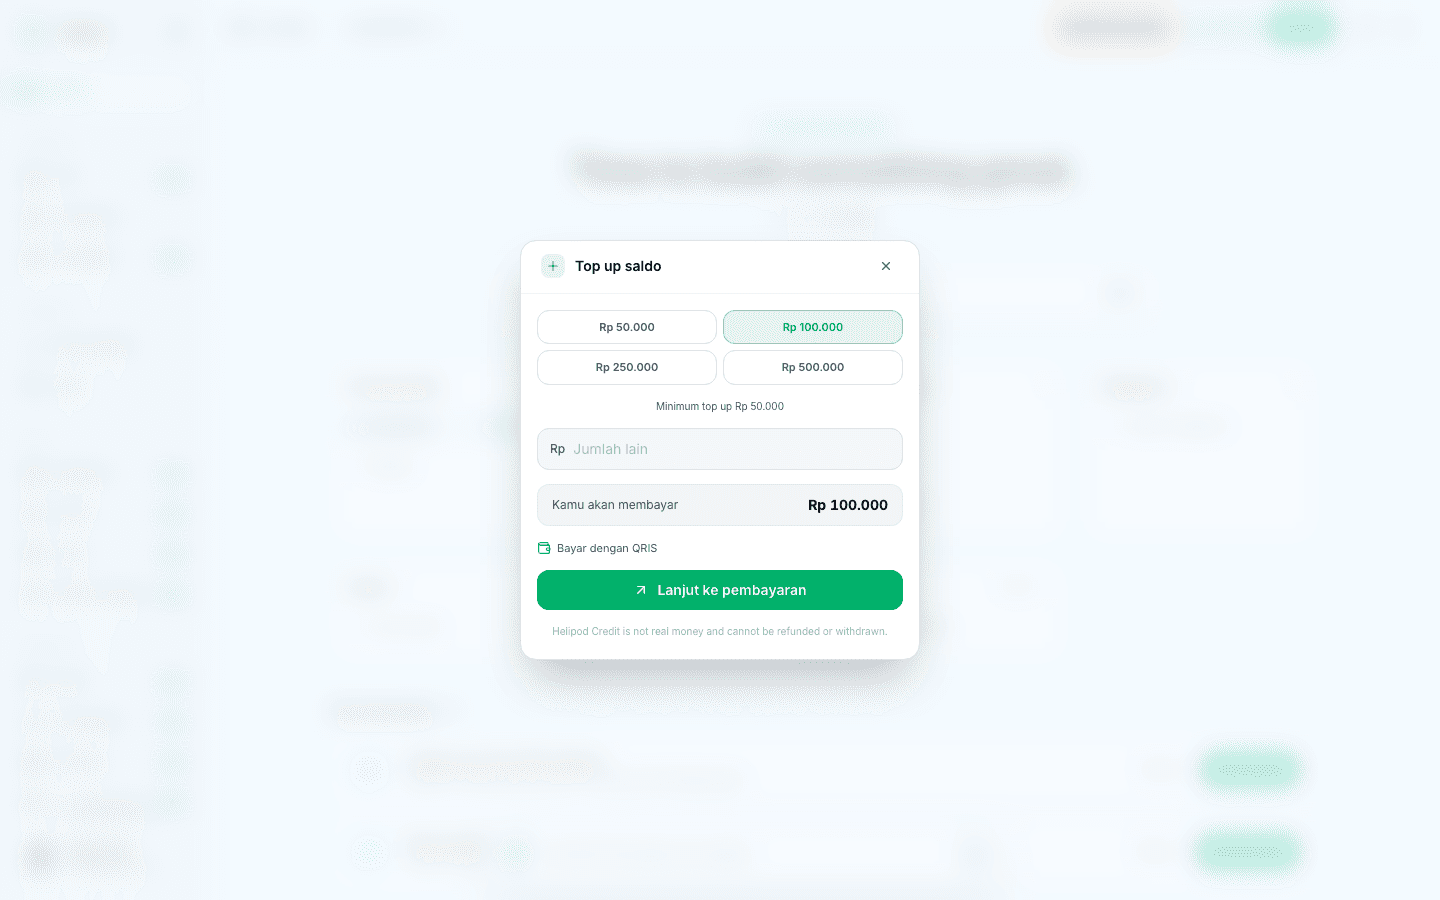
- Click Top up in the top bar (on a phone it is the + button).
- Choose an amount: Rp 50.000, Rp 100.000, Rp 250.000 or Rp 500.000, or type your own amount in the custom field. The minimum is Rp 50.000.
- Check You will pay and the line below it, which tells you which payment methods you will see for this amount.
- Click Proceed to payment. The payment page opens in a new tab. If your browser blocks new tabs, the current page goes to the payment page instead.
The payment methods depend on the amount:
- Smaller amounts: QRIS (and e-wallets such as DANA when they are offered).
- Medium amounts: QRIS or bank transfer (Virtual Account).
- Larger amounts: bank transfer (Virtual Account) only.
After you pay, the balance updates in the top bar. You can follow the payment on the Billing page, where an unpaid top-up shows as Pending with a Bayar (Pay) button until it expires.
Helipod credit is not real money: it cannot be refunded or withdrawn. Top up only what you plan to use.
Deploy your first app
With money in your wallet, choose what to run:
- A container: connect a Git repository and Helipod builds and runs it with HTTPS. Follow Deploy from GitHub. Containers are billed per day from your wallet.
- A VPS: a full Linux server with root access. Follow Buy a VPS.
When your app is online, add your own domain with Custom domain.
Next steps
Deploy from GitHub
Build and run an app from your repository.
Buy a VPS
Get a Linux server with root access.
Team and projects
Environments, shared variables, members and transfers.
Billing and top up
Wallet, AI balance, invoices and how each product is billed.
API keys and MCP
Automate Helipod and connect your AI assistant.
Support
Open a ticket or chat with us on WhatsApp.